Home Studio Setup Budget: Gear Economics for Indie Artists
The music technology market is flooded with marketing campaigns designed to convince independent recording artists that commercial sound quality requires a multi-thousand-dollar gear investment. The reality of modern digital audio recording is that digital converters and preamps in entry-level interfaces perform within fractions of a percent of high-end analog gear. Burning through your launch capital on expensive microphones while tracking inside an untreated bedroom is the fastest way to drain your budget with zero acoustic return. By establishing a strategic home studio setup budget, applying the 50/30/20 capital allocation rule, and understanding the law of diminishing returns in audio hardware, you can build a clean vocal chain that records radio-ready masters on an indie budget.
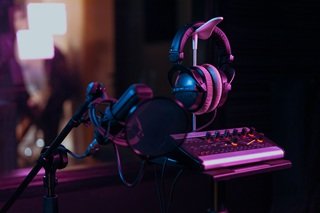
Home Studio Setup Budget: Balancing Gear Economics for Indie Creators
One of the most persistent traps ensnaring independent artists is Gear Acquisition Syndrome (GAS)—the mistaken belief that purchasing another piece of analog hardware will automatically solve vocal clarity, pitch accuracy, or acoustic harshness.
A $2,500 boutique tube microphone plugged into an interface sitting in an untreated bedroom will sound significantly worse than a $100 dynamic microphone recorded with proper positioning, clean gain staging, and controlled acoustic reflections.
Managing a practical home studio setup budget is not about buying the cheapest equipment available; it is about allocating your capital where it creates the highest measurable impact on your final audio master.
Understanding the economics of recording hardware allows you to build an efficient, professional vocal chain while keeping capital liquid for release marketing, mixing services, and production licensing.
The 50/30/20 Rule of Studio Capital Allocation
Most beginner recording artists allocate 80% of their cash to a microphone and an audio interface, leaving zero dollars for monitoring accuracy, reflection control, or baseline infrastructure. This allocation is backward.
To build a balanced, repeatable vocal tracking environment, structure your recording budget using the 50/30/20 Studio Allocation Blueprint:
[TOTAL RECORDING BUDGET]
 ├── 50%: Monitoring Accuracy & Acoustic Control (Headphones, DIY absorption, reflection management)
 ├── 30%: The Front-End Capture Chain (Microphone, audio interface, preamp gain staging)
 └── 20%: Infrastructure & Accessories (Pop filters, heavy-duty boom stands, balanced XLR cables)
50% — Monitoring & Reflection Control: If you cannot hear playback frequencies accurately through reliable monitoring, you cannot make proper EQ, compression, or tuning decisions. Similarly, unabsorbed drywall reflections entering the microphone ruin audio takes permanently.
30% — Front-End Capture: Modern 24-bit audio interfaces under $200 provide transparent analog-to-digital converters and ultra-low noise floors. Pair this with a reliable cardioid vocal mic.
20% — Physical Infrastructure: A wobbly $15 mic stand that drifts during a verse, or a cheap unshielded XLR cable that introduces 60-cycle electrical hum, ruins vocal takes regardless of your microphone’s price tag.
3 Strategic Budget Tiers for Independent Vocalists
To help you match your studio investment to your current career stage, here is how to budget your vocal setup across three distinct financial thresholds:
| Budget Tier | Total Cost | Primary Mic | Audio Interface | Monitoring Solution |
| Tier 1: Essential Bedroom | $350 – $500 | Audio-Technica AT2020 / Shure SM58 | Focusrite Scarlett Solo / MOTU M2 | Audio-Technica ATH-M50x (Closed-Back) |
| Tier 2: Semi-Pro Tracking | $800 – $1,200 | Lewitt LCT 440 Pure / Rode NT1 (5th Gen) | Audient iD14 / UA Volt 2 | Beyerdynamic DT 770 Pro + Moving Blankets |
| Tier 3: The Pro Production Rig | $1,800 – $2,500 | Shure SM7B (+ Cloudlifter) / Neumann TLM 102 | Solid State Logic SSL2+ / Apollo Solo | Slate VSX Modeling Cans + Rockwool Panels |
Tier 1: The Essential Bedroom Setup ($350 – $500)
This is the baseline standard for any indie artist recording demos, writing melodies, and tracking vocals for digital distribution.
The Microphone ($100 – $130): An Audio-Technica AT2020 (condenser) provides crisp, modern high-end presence for rap and R&B. If your room has loud background noise or zero soft furniture, opt for a Shure SM58 (dynamic), which naturally rejects ambient room hum.
The Audio Interface ($120 – $180): A Focusrite Scarlett Solo (4th Gen) or MOTU M2 offers clean preamps with more than 55 dB of gain, transparent converters, and direct zero-latency monitoring.
Monitoring Headphones ($150): The Audio-Technica ATH-M50x or Sony MDR-7506. Closed-back earcups are mandatory at this stage to prevent beat bleed from spilling into your vocal microphone during energetic takes.
Acoustics & Essentials ($50 – $70): A heavy boom stand, a 10-foot shielded Mogami or Canare XLR cable, a dual-layer mesh pop filter, and your own bedroom duvets hung behind you as described in our blueprint on Home Vocal Recording Techniques: How to Get Studio Quality in a Bedroom.
Tier 2: The Semi-Pro Tracking Rig ($800 – $1,200)
This setup is ideal for independent artists releasing commercial singles and EPs who need higher dynamic range, lower self-noise, and tighter acoustic control.
The Microphone ($270 – $300): The Lewitt LCT 440 Pure or Rode NT1 (5th Gen). These microphones offer class-leading self-noise figures (under 7 dBA), meaning you can apply aggressive vocal compression without amplifying microphone circuit hiss.
The Audio Interface ($200 – $270): The Audient iD14 MkII or Universal Audio Volt 2. The Audient features discrete console-grade preamps and top-tier Burr-Brown converters, providing noticeable depth in the 1–5 kHz vocal range.
Monitoring & DIY Acoustic Panels ($350 – $400): Beyerdynamic DT 770 Pro (80 Ohm) closed-back tracking headphones, combined with building four to six DIY acoustic absorption panels using 3-inch dense mineral wool (Rockwool Safe’n’Silent) framed in wood.
The Studio Monitor Trap in Untreated Bedrooms
The most common budget mistake made by indie artists is spending $400 to $600 on active 5-inch or 8-inch studio reference monitors (such as Yamaha HS5s or KRK Rokits) while tracking in a square, untreated bedroom.
Physical acoustic laws dictate that placing studio monitors in a standard residential room without massive bass trapping creates severe room modes—standing waves that cancel out sub-bass frequencies and amplify lower-mid mud (100–300 Hz) by as much as 12 to 18 dB.
When you play your song through monitors in an untreated room:
You hear false bass nulls and overcompensate by boosting the 808s in your mix.
You take the song to your car, and the low-end distorts violently.
The open monitor playback cannot be used during tracking anyway because of extreme feedback and microphone spill.
The Economic Solution: If your total budget is under $1,500, skip studio monitors entirely. Invest in flat-response, closed-back tracking headphones for recording, and a pair of open-back reference headphones (such as the Sennheiser HD600) or software-modeled headphone systems (such as Slate VSX) for mixing evaluation.
Hardware Economics: The Law of Diminishing Returns
In analog recording gear, audio performance does not scale linearly with price:
[INVESTMENT vs. QUALITY RETURN]
$100 Mic/Interface  ──> 80% Commercial Quality (Clean, low-noise, transparent)
$500 Mic/Interface  ──> 92% Commercial Quality (Lower self-noise, richer harmonics)
$3,000 Hardware Rig ──> 96% Commercial Quality (Fractional analog coloration)
The jump from a built-in computer microphone to a $120 external audio interface and cardioid condenser mic provides an immediate 70% increase in audio quality.
However, moving from a $250 Lewitt or Rode microphone to a $3,500 vintage Neumann U87 yields roughly a 4% to 5% audible improvement—an improvement that is entirely erased if your room lacks professional acoustic treatment or if the song is poorly mixed.
Spending thousands on boutique hardware before mastering basic microphone technique and room setup is financially irresponsible for an independent creator.
The Fatal Budget Leak: Recording Over Compressed Audio
You can invest in the finest microphone, pristine interface converters, and professional reflection filters, but if you record your performance over a squashed, low-bitrate MP3 beat ripped from the internet, your entire release will sound cheap and amateur.
A compressed MP3 file permanently strips dynamic range and cuts out vital high frequencies above 16 kHz. When you record high-resolution vocals over a locked MP3 track, the vocal performance floats unnaturally on top of the beat rather than blending into the mix pocket.
To maximize your recording investment, allocate part of your project budget to pristine production assets.
Licensing uncompressed, high-headroom 24-bit WAV files from an authorized catalog like Prod By DSG provides the dynamic headroom your audio interface preamps need to capture professional vocal takes.
Furthermore, budgeting for multi-track WAV stems gives your mixing engineer direct access to isolated kick drums, sub-bass, and instrument layers. This makes it easy to carve clean EQ pockets for your vocals to sit deep inside the track, a process broken down in What Are Beat Stems? Why Trackout Files Are Essential for Artists.
Home Studio Budget Frequently Asked Questions
Q: Can I get professional results with a USB microphone instead of an XLR setup?
A: USB microphones contain the microphone capsule, preamp, and analog-to-digital converter packed onto a single small circuit board. While convenient for voiceovers and podcasting, they lack clean dynamic headroom, offer poor hardware monitoring options, and cannot be upgraded modularly. An XLR microphone paired with a dedicated USB audio interface is the professional standard for music production.
Q: Do I need a Cloudlifter or inline preamp for home recording?
A: Only if you are using low-output dynamic microphones like the Shure SM7B (which requires around 60 dB of clean gain) with older or budget interfaces whose preamps introduce hiss at maximum volume. If you use a standard condenser microphone, it runs on +48V phantom power and does not require an inline gain booster.
Q: How much should an independent artist spend on their first home setup?
A: A budget of $400 to $600 is the sweet spot. This range covers a high-performance audio interface, a dependable condenser or dynamic mic, closed-back tracking headphones, an XLR cable, a pop filter, a sturdy boom stand, and basic DIY reflection dampening.
📚 Related Blueprints & Music Business Guides
Make informed decisions across your production pipeline with our essential technical resources:
Avoid Codec Audio Loss: Learn how uncompressed audio formats preserve dynamic clarity inside MP3 vs WAV Spotify: Which Beat License Do You Actually Need?.
Protect Your Release Rights: Master commercial master ownership and licensing boundaries before tracking by reviewing Beat Licensing Explained: Lease vs Exclusive Rights for Artists.