How to Record Vocals at Home: The Radio-Ready Guide
You do not need a multi-million dollar commercial tracking studio to achieve a clean, professional vocal print. With a few strategic adjustments to your acoustic environment, microphone placement, and signal chain, you can capture radio-ready stems right from your bedroom or home setup. This practical guide walks you through essential home recording techniques, gain staging principles, and DIY room treatment hacks to eliminate muddy background reflections and maximize your performance.
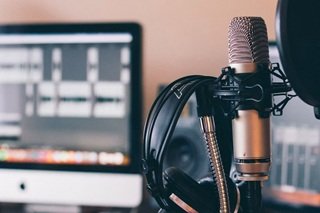
How to Record Vocals at Home: A Guide for Independent Artists
The modern music industry has shifted dramatically, allowing independent creators to write, record, and release hit records directly from their bedrooms. While having access to commercial studio spaces is a luxury, it is no longer a strict requirement for sonic success. Many chart-topping singles are tracked using modest home studio setups. However, moving your recording environment out of a professionally treated booth means you have to be incredibly intentional about how you capture your sound. A great performance can easily be undermined by a poorly captured recording.
Acoustic Treatment Hacks for Small Spaces
The biggest obstacle when figuring out how to record vocals at home isn’t usually the microphone itself—it is the room around the microphone. Sound waves travel from your mouth, past the mic, bounce off hard drywall or windows, and reflect right back into the front and sides of your microphone capsule. This creates a boxy, hollow echo that is virtually impossible to fix during the mixing stage.
To tackle this without spending hundreds on professional acoustic panels, focus on soft materials:
Use a Full Closet: Recording inside a closet filled with clothes is one of the most effective, time-tested home studio hacks. The dense fabric absorbs reflections perfectly, creating a completely dry vocal environment.
The Heavy Blanket Trick: If a closet isn’t an option, hang heavy moving blankets or comforters behind your head. Microphones primarily capture what is directly in front of them, meaning your voice bouncing off the wall behind you is what enters the mic capsule.
Setting Your Gain and Avoiding Digital Clipping
Once your room is deadened, the next critical step is managing your signal flow. A common mistake independent artists make is cranking up the input gain on their audio interface to make their voice sound instantly loud. This causes digital clipping, adding permanent, unpleasant harshness to your audio peaks.
When adjusting your interface level, look at your digital audio workstation (DAW) meters. Your vocals should average around -18 dBFS, with the absolute loudest peaks hitting no higher than -12 dBFS or -10 dBFS. This practice, known as gain staging, leaves plenty of headroom for your mixing engineer to safely apply compression, EQ, and saturation later without distorting the track.
Mastering Proximity Effect and Microphone Technique
Your physical positioning relative to the microphone changes the tone of your performance. If you stand too close to a directional condenser microphone, a physics phenomenon known as the proximity effect occurs, artificially boosting the low-end frequencies of your voice. While this can add warmth to a soft R&B cadence, it can quickly make a fast rap flow sound muddy and indistinct.
As a gold standard, position a pop filter roughly 2 to 3 inches away from the mic capsule, and stand an additional 4 to 6 inches back from the pop filter. This specific distance balances vocal clarity with natural low-end body. If your performance calls for an aggressive, high-energy delivery, lean back slightly to prevent overloading the capsule; if you are tracking an intimate, melodic hook, move slightly closer to capture the subtle nuances of your tone.
Aligning Raw Vocals with Premium Production
Capturing a flawless, unclipped vocal track is only half of the equation. To create a compelling, cohesive single, those clean vocals must be paired with an equally pristine canvas. Recording over unmastered or poorly balanced background loops makes it incredibly difficult for your voice to find its natural pocket within the stereo field.
By tracking your performance over premium instrumentals from Prod By DSG, you are ensuring that your home-recorded vocals are layered over an industry-standard sonic foundation. The low-end elements, transient spacing, and melodic frequencies are carefully arranged to leave a dedicated pocket for human speech, allowing your home recordings to translate beautifully across commercial speaker systems.
Put Your Recording Setup to the Test
Now that you understand the mechanics of room control, gain staging, and microphone positioning, it’s time to start tracking. Open up your DAW, prepare your input settings, and choose the perfect backdrop for your project.
You can head over to our active store player to preview an expansive collection of rap, hip-hop, melodic trap, and R&B options designed specifically for modern independent artists. If you have technical questions about matching a specific beat tempo or need custom audio configurations for an upcoming session, reach out today and let us know how we can streamline your production workflow.
Home Recording FAQs
Q: Do I need an expensive microphone to get radio-ready vocals at home? A: No. An affordable condenser microphone can sound incredible if your room is acoustically treated and your gain is set correctly. Proper technique and a quiet environment matter far more than a high price tag.
Q: Should I record my vocals with effects like reverb or autotune turned on? A: You can monitor with effects turned on if it helps your performance, but always record and export your raw, dry vocal tracks without any permanent effects printed onto the file. This keeps all processing options open for the final mix.
Q: What is a pop filter and is it actually necessary? A: Yes. A pop filter diffuses sudden bursts of air caused by “plosive” sounds (like words starting with P, B, or T). Without one, these air blasts strike the microphone capsule directly, causing loud, low-frequency thuds that ruin an otherwise perfect take.